| 1. |
Clean window with a typical household window cleaner and dry with a lint free cloth.
Determine your window size, and compare it to the WindowView. If cropping is needed to fit onto glass, decide which portion of the image is to be used. Avoid applying to windows that have been recently exposed to extreme hot or cold conditions.
|
|
| 2. |
SINGLE PANE WINDOWS:
Trim the image approximately 1 inch larger than the glass. The top should be a clean, straight edge for alignment purposes or use a factory edge.
MULTI-PANE WINDOWS:
Some additional trimming is necessary. Measure the height of both panes. Trim the WindowView approximately 1 inch longer than each piece of glass. For best alignment, remove a space equal to the horizontal window divider. Again both top edges of the two sections should be cut clean and straight to assure the best results.
|
 |
| 3. |
Add water and 2-3 drops of liquid dish soap to the spray bottle provided. Mist glass liberally with water/soap solution. The water/soap solution will allow the WindowView to be positioned more easily. |
 |
| 4. |
Lay the WindowView face down on a clean, flat, hard surface. Beginning with one corner, gently separate entire backing material from the WindowView.
Starting with the top edge, position image (making sure it is straight) on the window. Gently smooth out any air bubbles with your hand.
|
 |
| 5. |
Glide squeegee with the squeegee sleeve (provided), over the image to work all air bubbles and excess water/soap solution toward the edges of the WindowView. If needed, lift edge of WindowView closest to any large bubbles and smooth back down. Remist if necessary. |
 |
| 6. |
Once WindowView is in place, trim to fit the window using a standard utility knife or single edge razor blade.
NEW blades work BEST and a straight edge should be used as a guide. Trim (a little long if needed on first cut) so that no light can seep through between the cut edge and window trim/frame.
|
 |
| 7. |
Using a soft towel, gently dry your WindowView, particularly at the edges.
|
 |
Storing WindowViews
Roll backing material with the shiny side out, place it in the poly bag and put it in the shipping container. If you do take the WindowView down, placing it on the backing material is the best way to store the WindowView and preserve it for future reuse.
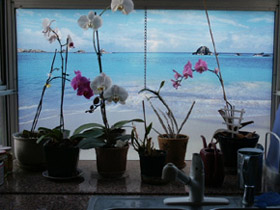
Q: What are WindowViews?
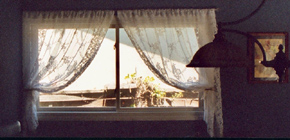
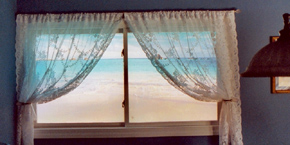
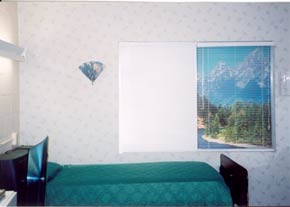
A: WindowViews are photographic images of the most wonderful scenery from around the world, printed onto large sheets of clear static-cling plastic, creating beautiful window coverings that people can apply easily to their windows, transforming a dreary view into a picturesque one.
One of the many wonderful aspects about these products is that once they are in place, mounted on the interior side of a window, they are naturally backlit by daylight, which seems to ignite the image to look very realistic. One could have a Hawaiian view out their window while actually living in downtown Detroit.
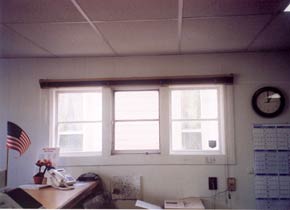
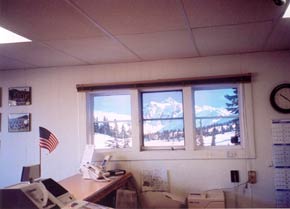
Most of us have at least one window where live or work that has a less-than-desirable view. Well, it doesn't have to be that way anymore! What a window! has created a patented product that allows anyone to have a spectacular view out any window, all the time.
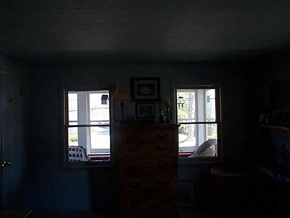
Q: Does light shine through the product when installed?
A: Yes. Once installed, light does shine through the window. In fact, daylight tends to backlight and further enhances the WindowViews image by what a window!
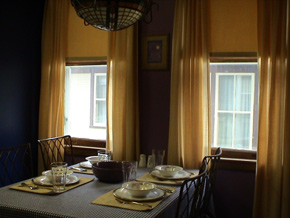
Q: Do WindowViews provide visual privacy?
A: Yes! WindowViews were designed to permit light into a space, yet provide maximum visual privacy.
Q: How long will the product adhere to the window?
A: This will vary depending upon climate conditions. Properly preparing the window per the instructions ensures maximum duration for the product staying in place. Under normal conditions, our static cling WindowViews will stay in place indefinitely.
Q: What do I do if my WindowViews does not adhere properly?
A: If after following the instructions provided, the WindowViews is still not adhering properly, carefully remove and place the image side down on a clean smooth surface. Gently rub back and forth with a damp cloth to restore the static cling. Reapply following the initial instructions.
Q: Can I remove the product and reinstall in a different window?
A: Yes, absolutely. Since this product was designed with static cling adhering properties, you have the flexibility to remove and reinstall the product in other windows. You may need to recharge the static properties if multiple reinstallations cause the WindowViews to adhere improperly.